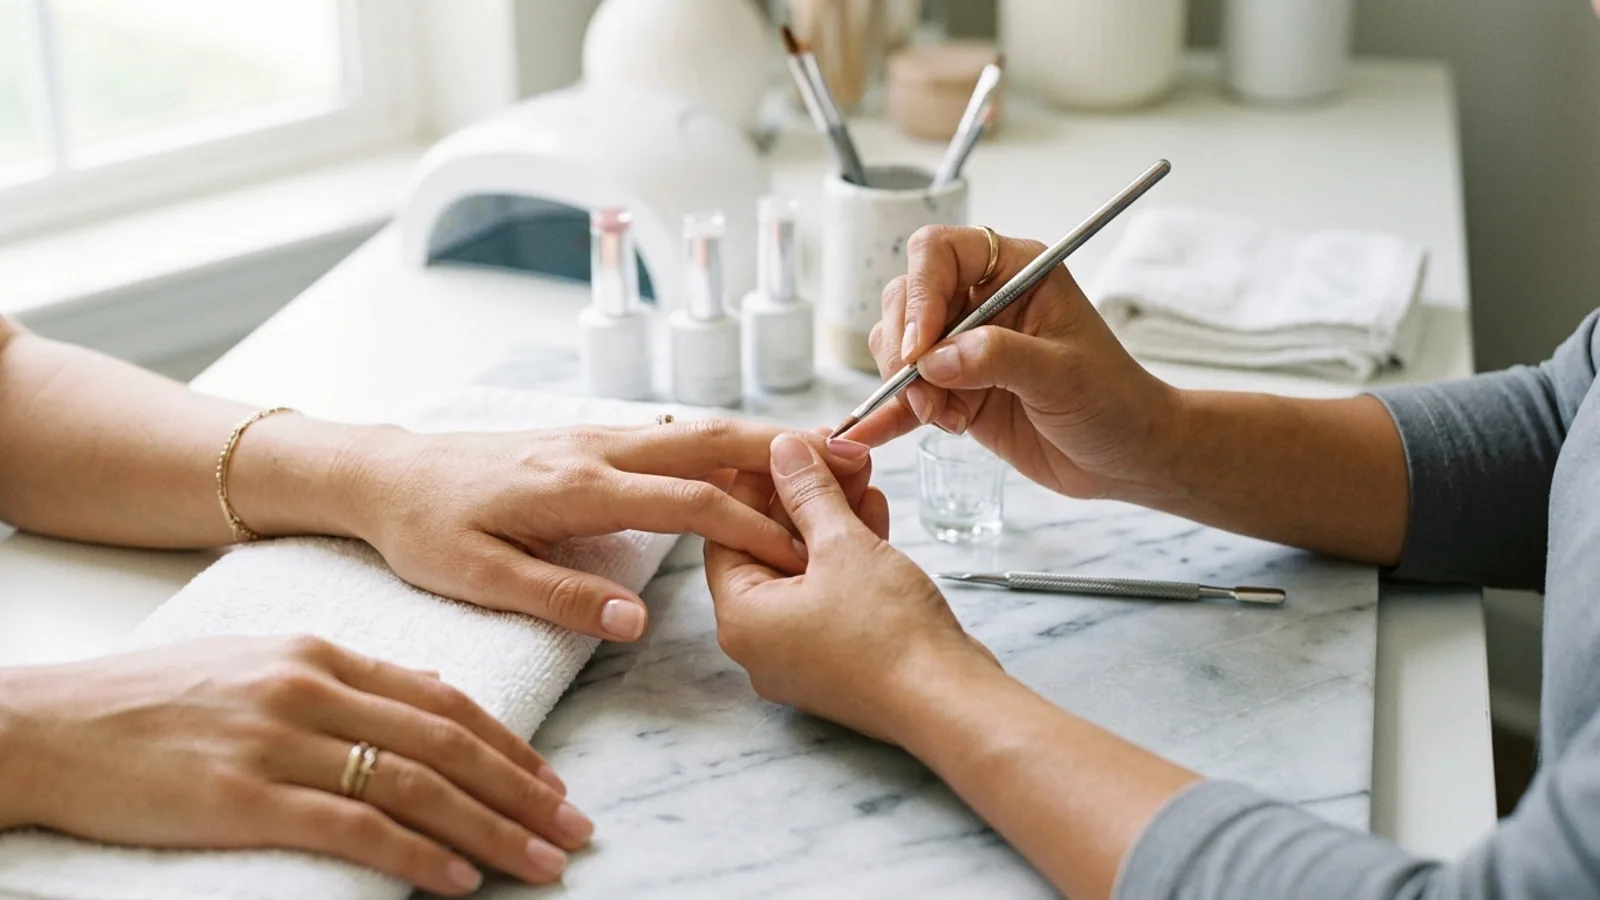
Starting as a Home Nail Tech: What You DO and DON'T Need
An honest guide to start charging for manicures at home without spending $10,000 MXN on a kit you won't use. The golden rule: spend the minimum viable, scale with real clients.
The golden rule for starting as a home nail tech: spend the minimum viable and scale with real, paying clients, not your credit card. Minimum viable setup (48W lamp + base kit + primer + pro polishes): ~$1,500 MXN, enough for your first 10 clients. Intermediate setup once you have 3 regular clients: ~$4,000 MXN. Professional setup with 6-12 months of operation: ~$10,000 MXN (including e-file, curing lamp, and acrylic kit). What you DON'T need on day 1: an electric e-file, a large UV curing lamp, a complete acrylic kit, 50 random polishes, or trying to do polygel + gel + acrylic simultaneously.
There's a pattern that repeats every week in Mexican nail Facebook groups: someone uploads a photo of their new "complete professional kit" — e-file, 200W UV lamp, 8-color acrylic powders, polygel, gel, monomer liquid, 40 polishes, gems, chrome powder, 12 different brushes — and asks how to get clients. Three months later, that same person sells everything on Marketplace because "it didn't work."
It didn't work because the order was reversed. Clients don't come because you have the equipment. You get the equipment because you have clients. And building a home nail business in Mexico — whether in San Luis Potosí, Querétaro, León, or any mid-sized city — works exactly opposite to the marketing of "all-inclusive" kits.
This guide is for the real aspiring nail tech: the student from UASLP who already does her own nails and feels she could charge, the professional who wants extra income working Saturdays, the mom who needs flexibility and saw her friends paying $300 every two weeks. We're going to tell you what to buy first, what not to buy yet, how to start charging without embarrassment, and when it makes sense to invest in serious equipment.
Spoiler: the $1,500 MXN setup isn't "the cheap beginner's kit." It's the right setup. It's the one that allows you to charge $200-300 per manicure from the first month and recoup your investment in 5-8 clients.
- A basic gel polish manicure at home charges between $200 and $400 MXN in San Luis Potosí in 2026
- With 3 clients a week, you can recoup a minimum setup of $1,500 MXN in 1 to 2 months
- Social media (IG and TikTok) is the only real marketing channel for a home nail tech at the beginning — Facebook no longer converts
- The most common mistake is buying pro setup before having 5 regular clients
- The prices mentioned are realistic ranges from Mercado Libre Mexico in May 2026 — they fluctuate, verify before buying
When you stop doing your own nails and start charging
Before we talk about what to buy, it's worth discussing when you're ready. Because there's a huge difference between "I do my nails and they look good" and "I can charge someone, and they'll be happy."
Signs that you're ready to start charging:
- You've done a gel polish manicure that lasted at least 2 weeks without lifting on any nail.
- You know the product names — not just "the top one" but base coat, top coat, rubber base, primer, dehydrator. If you don't understand the difference between primer and pH balancer, you're not ready yet.
- You've practiced on 5 friends or family members (for free) and they all said they liked it without you asking "is it okay?". Honest, unsolicited validation is very different from obligatory politeness.
- You can do a manicure from start to finish in less than 90 minutes. If it takes you 3 hours, you'll be undercharging for your time.
- You have a clean place with good lighting where the client feels comfortable. Even if it's the dining room table.
How to charge for the first time without dying of embarrassment:
Charge $150-200 MXN for your first paid manicure. Not $80, not "whatever you think." Charging $80 trains you to give away your work and trains the client to expect unsustainable prices.
If a friend tells you "don't charge me yet, better when you're better," respond: "I'll give you $50 less than my starting price, but I charge because I need you to tell me if it's worth it." It's an honest negotiation and removes the trap of indefinite free work.
Your first 3 paying clients usually come like this: a friend who let you practice and now pays, her cousin or coworker she told, and someone who found you on social media after that second person uploaded a photo. That's your real funnel for the first few weeks. You don't need a more complicated plan than that.
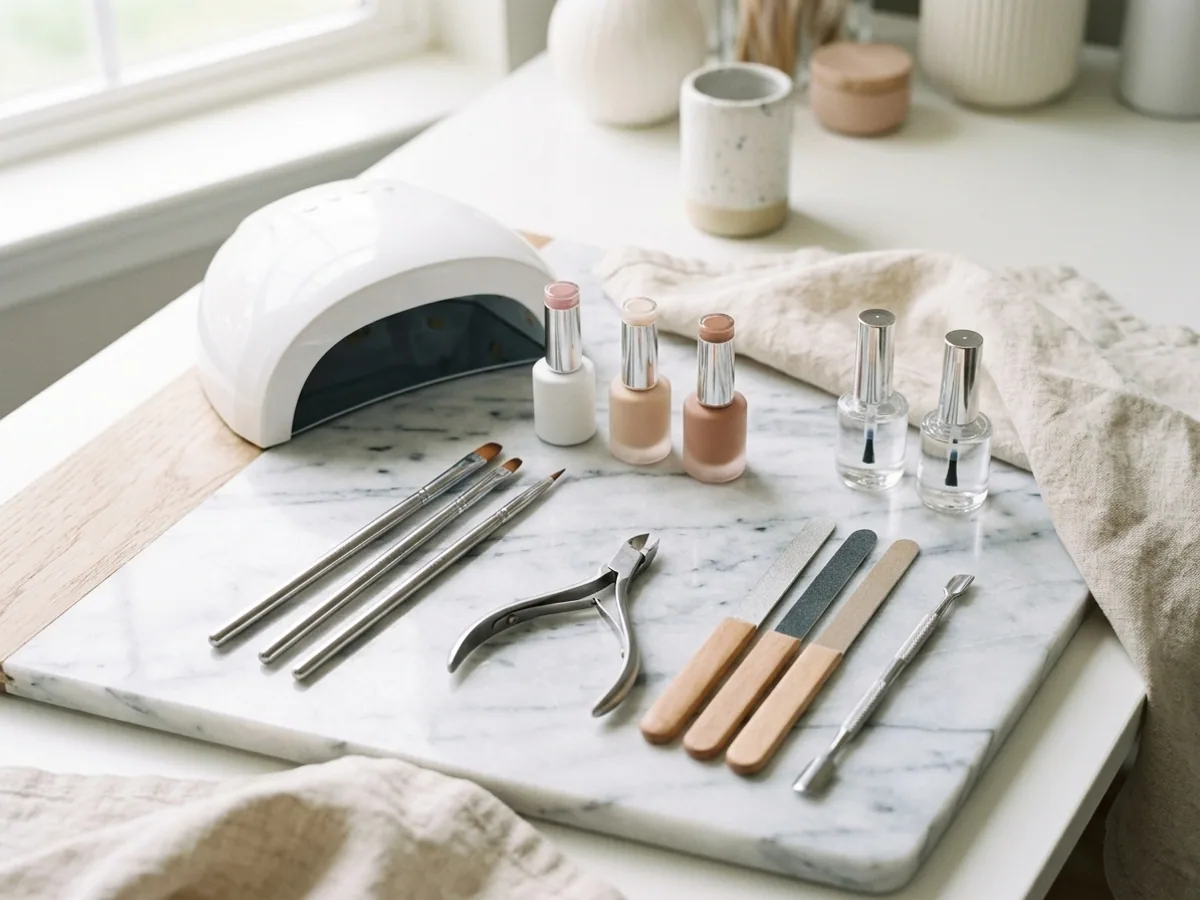
What you DO need (minimum viable kit, ~$1,500 MXN)
These are the 6 elements that make up a functional kit to start charging. They're not the "cheap" kit — they're the right kit. Skipping any of them will cost you later (in lost clients, lifted nails, wasted time).
1. 48W LED/UV Lamp (no less)
The lamp is the piece that most affects the final quality of your work, and the first place people make a mistake by saving money. Mini USB lamps for $129 work for doing your own nails on a Sunday, but not for charging. They take 60-90 seconds per coat, only cure one hand at a time, and inconsistent power causes the gel to be improperly cured at the base — which is exactly where it lifts first.
48W is the professional minimum. It cures a full hand in 30-60 seconds, has a fixed timer (which means you're not counting seconds in your head while chatting with the client), and handles gel, gel polish, polygel, and rubber base without issue.
For more detailed comparisons between models, read our guide to the best UV/LED nail lamps in Mexico. But if you want to get straight to the point: the Obp SUNone 48W is the most recommended option by Mexican nail techs who are already charging. Digital display, motion sensor, 30/60/99 second timers, and it withstands 2-3 years of continuous use.
2. Base kit + polishes to start
Here's a simple decision: do you buy everything separately or buy a kit? To start, buy a kit. It saves you a month of comparing inconsistent brands of bases, top coats, and removers, and gives you an immediate collection of polishes to offer color to your first clients.
The Shinetour 54W Kit with 21 polishes included is the best-seller for starting nail techs: 31 components, lamp included, base and top coat, remover, basic tools. It sells for around $550 MXN. If the kit's lamp seems too small for growth, you can buy the Obp SUNone 48W separately (recommendation 1) and this kit becomes your backup — the extra lamp serves for double appointments or as a spare.
If you want a more complete starter kit and don't mind paying an extra $200 MXN, the Limegirl TF-M-01 with 62 pieces is the most equipped on the market.
If you have doubts about what exactly to look for in a kit, check out our complete guide on how to choose your first gel nail kit — it explains every component that matters and which ones are fillers.
Producto recomendado
Kit Shinetour 54W — 21 Esmaltes + Lámpara + Tools
Shinetour
3. Primer + pH Balancer + Cuticle Oil (the real essentials)
This section is what differentiates you from "someone who does your nails at home" and "someone who does your nails and they last 3 weeks." Economical kits almost never come with real primer or pH balancer — and without those steps, gel polish lifts within a week, especially on oily nails or clients who wash their hands frequently.
The Mc Nails trio (primer, pH balancer, cuticle oil) is the most recommended prep kit in Mexico. It's applied before color: the pH balancer cleans and dehydrates the natural nail, the primer creates an adhesion layer, and the oil is to finish the service, leaving cuticles looking new. All three together cost around $350 MXN and will last you 3-6 months of daily services.
If you skip this step to "save money," you'll have clients complaining that their nails lifted by day 5. The difference between charging $250 and having them return, versus charging $250 once and never seeing them again, is this $350 MXN.
4. Polishes with professional pigmentation
The 12-21 polishes that come in your kit will last you the first 1-2 months for clients who request basic colors. But as you start getting regular clients, you'll notice two things: (1) some kit colors have poor coverage and require 3 coats, and (2) more demanding clients ask for specific shades not in the basic range.
This is where investing in 2-3 bottles of a pro brand comes in. Organic Nails Sailor in a 15 ml presentation is our recommendation because it's a professional Mexican brand, comes in double the quantity of a standard polish (15 ml vs 7-8 ml), and its pigment covers uniformly in a single coat. One bottle will last you 4-6 months of intensive use.
For a broader view of which brands are worth it on ML Mexico and which aren't, read the complete comparison of gel polishes. The short version: start with the most requested color (a nude that looks good on medium-dark skin, or a classic red), and grow from there.
5. Rubber/leveling gel (the key to long-lasting nails)
If you had to learn just one "technical secret" before charging, it's this: rubber base is the difference between a manicure that lasts 1 week and one that lasts 3. A rubber gel (also called leveling gel or flexible builder gel) is a thicker base that's applied before color, strengthens the natural nail, and flexes with it. This drastically reduces lifting — especially for clients with thin, brittle nails or who work with their hands.
Fantasy Nails is a professional Mexican brand, and their set of 6 rubber leveling gel shades is the standard for serious nail techs. It costs around $450 MXN and will last you 4-6 months with regular clients. The shades range from clear to nudes, so it also serves as a structural layer when a client requests just "strengthened natural nails."
If you want to understand the complete rubber base technique before buying it, read our explainer on the rubber base technique. Skipping this product in the minimum setup is tempting because it seems "extra," but it's probably the best return on investment on this entire list.
6. Tips/molds for extensions (optional but useful)
This is the only "optional" product in the minimum setup. If your first 5 clients are young women aged 18-25 who prefer natural or short nails, you don't need it yet. But as soon as your first client asks for "a little longer" — and they will — you'll want to have something ready instead of sending them to someone else.
OBP soft gel tips in a 600-piece presentation give you molds in all sizes and shapes (almond, square, coffin) for around $120 MXN. The soft gel technique is much easier to learn than traditional acrylic: you glue the tip with builder gel, cure it in the lamp, shape it, and paint it like a normal nail. No powders, no monomer, no chemical smell filling your home.
To delve deeper into when each extension technique is suitable — gel, acrylic, polygel, or press-on — read the comparison between the main methods. If you don't feel ready to do extensions yet, don't offer them. It's better to say "I do manicures with your natural length and gel polish" and build a reputation on that first.
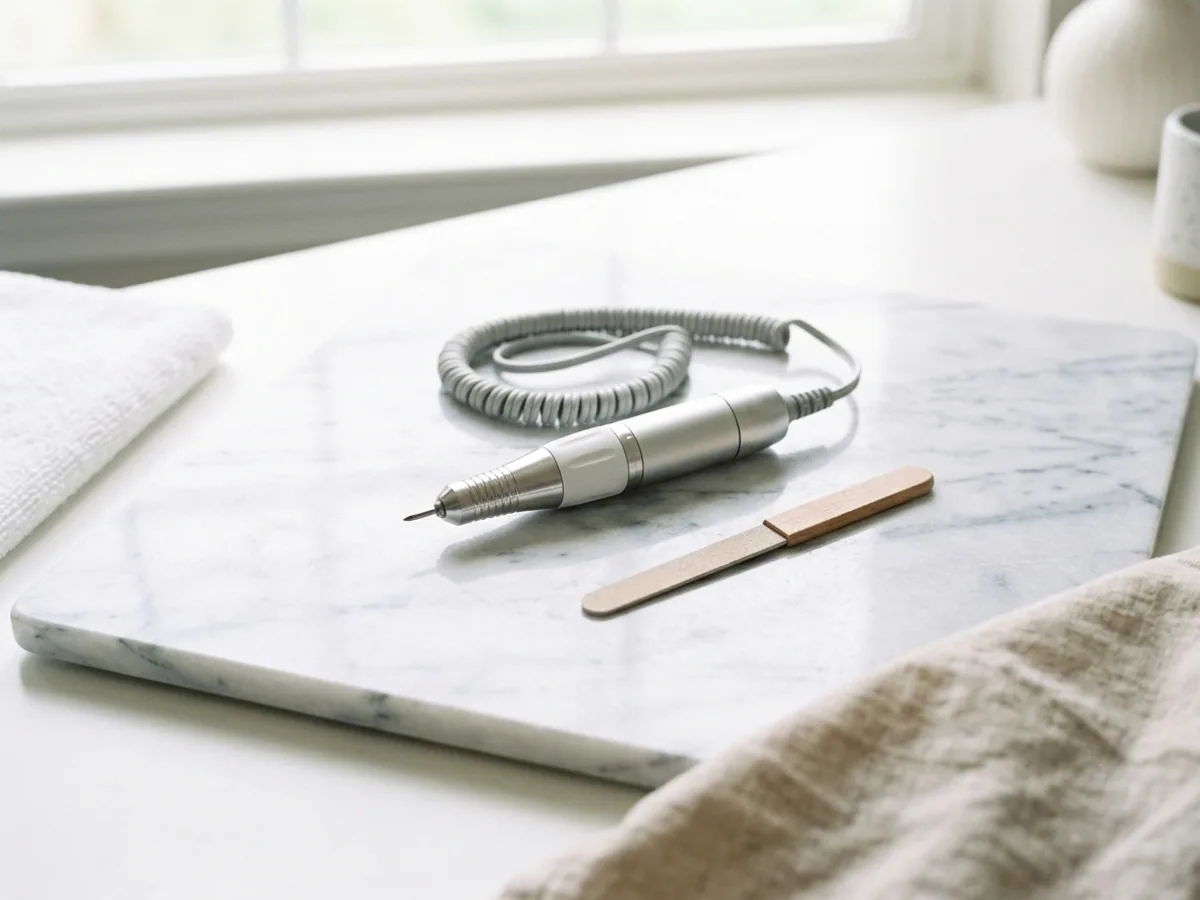
What you DON'T need on day 1 (they'll sell it to you, don't buy it)
This is the section no YouTube tutorial will make because they're sponsored by brands that sell these things. Here's the truth about what will sit in the box collecting dust for months:
Electric e-file ($1,500-3,000 MXN): This is the #1 thing people buy and don't use. The e-file is for speed, not for results. A nail tech with 5 years of experience can do in 8 minutes with an e-file what you'll do in 12 minutes with a good 100/180 grit file — but the quality of removal and nail prep is the same. Buy an e-file when your bottleneck is time (5+ clients a week), not when you're a beginner. Learning to use an e-file incorrectly can damage your clients' nails, and that will kill your business.
Large UV curing lamp / 200W+ lamp: Professional curing lamps are for salons that rotate 8-15 clients a day and need to cure two hands in 15 seconds. For 1-3 clients a day at home, a 48W lamp is perfect — it cures one hand in 30-60 seconds while you paint the other. A large curing lamp consumes more electricity, takes up half a table, and doesn't give you any real speed advantage.
Complete acrylic setup ($1,500-3,000 MXN): monomer liquid, 4 colored powders, special brushes, dappen dish, pinching tools... traditional acrylic has a brutal learning curve and a much smaller margin for error than gel. If you decide to specialize in acrylic, do so after 3-6 months of gel and taking a real course (not YouTube). The comparison of gel vs acrylic vs polygel explains why.
Polygel + gel + acrylic simultaneously: choose ONE for the first 6 months. Doing all three techniques poorly is worse than doing one well. Most Mexican nail techs who consistently charge specialize in gel/gel polish for short services and soft gel for extensions. Acrylic is a separate niche worth adding later, not in parallel.
50 random polishes: 5-10 polishes in universal colors cover 90% of clients. These universal colors are: 2 nudes (one pinkish, one beige), 1 classic red, 1 wine/burgundy, 1 black, 1 white, 1 French (pale pink or nude), and 1-2 seasonal (olive green in fall, lavender in spring, etc.). As your clients request specific colors, you buy them. Not the other way around.
3D decoration, gems, stickers, chrome powders: 80% of clients request solid colors for the first 6 months. Decoration is an add-on that you charge separately ($30-80 MXN extra per nail). Add these products when 1 out of every 3 clients asks for them — before that, chromes and gems will stay in the drawer.
Professional manicure table with extractor: The extractor only matters if you work with acrylic (which you're not doing yet). Any stable table with good frontal lighting works for the first 6 months. Invest in lighting before furniture — a good LED desk lamp ($200-400 MXN) will change the quality of your work more than any $3,000 table.
Premium courses ($3,000-8,000 MXN) before having clients: Online courses are fine after your first 10 clients, when you already know what you specifically need. Before that, YouTube and free practice on friends will give you 80% of what you need. Courses serve to perfect technique, not to start.
When it IS time to scale to professional equipment
If you followed the minimum setup path and started charging, at some point between month 3 and month 6, you'll start to feel like your equipment is no longer enough. That's a good sign — it means you already have real, paying clients. Here are the objective, not ego-driven, signs that it's time to scale up:
Sign 1: You have 3+ regular clients per month (each returning every 3-4 weeks). This is the baseline. If you have 3 regular clients, you're already generating around $1,000 MXN per month recurring — enough to start reinvesting.
Sign 2: You have a waiting list. Clients ask for an appointment, and the first available is in 2 weeks or more. This means your bottleneck is time, not quality — and that's when an e-file and curing lamp come in.
Sign 3: Consistent income above your initial investment. If you've been charging for 3 months and your gross income exceeds $4,500-5,000 MXN per month, you've already recouped the minimum setup and consumables, and you can allocate the next surplus to new equipment.
Sign 4: Your clients request services that your current equipment doesn't support. The most common: they ask for long extensions with traditional acrylic (not soft gel). At that point, it makes sense to invest in an acrylic kit — because you already have proven demand.
What to add first, in this order:
- More pro polishes ($300-600 MXN): expand your palette to 15-20 colors with brands like Organic Nails, Cherimoya, or Madam Glam. The polish comparison will guide you on which ones are worth it.
- Complete premium rubber base (~$450 MXN): if you only have the Fantasy Nails set of 6, add specific clear and nude rubbers to complement it.
- Quality electric e-file ($1,500-2,500 MXN): only when you have 5+ clients a week. Before that, it's a luxury.
- Pro curing lamp / 180W+ lamp ($450-800 MXN): when you regularly do pedicures or want to cure two hands at once.
- Complete acrylic kit ($1,500-2,000 MXN): only if you've already decided to specialize in acrylic and taken a course. Example of what comes next: the MC Nails professional kit with backpack includes the 23 essential items to start doing serious acrylic.
- Real course with an experienced nail tech ($1,500-4,000 MXN): perfect the technique where you feel you're not progressing with YouTube.
Producto recomendado
Kit MC Nails Profesional con Mochila 23 Piezas
MC Nails
Setup Comparison
Minimum Viable
- Professional 48W lamp
- Complete base kit + 21 polishes
- Primer + pH balancer + cuticle oil
- 1 pro 15 ml polish
- Recoup investment in 5-8 clients
- Lacks rubber base for maximum durability
- No extension options yet
For nail tech with 0-3 months charging, tight budget
Ver precio actualIntermediate
- Everything from minimum + Fantasy Nails rubber base
- OBP 600-piece tips for extensions
- 3-4 additional pro polishes
- Backup lamp from the kit
- No e-file yet (not necessary yet)
- No acrylic
For nail tech with 3-6 months, 3+ regular clients per month
Ver precio actualProfessional
- Electric e-file + pro 180W+ curing lamp
- Complete MC Nails acrylic kit
- 20+ pro polishes
- Specialized course
- Table with extractor
- Serious investment; only justified with 5+ clients/week
For nail tech with 6-12 months operating, real waiting list
Ver precio actualPractical Business Model: How to charge for your first manicures
The right equipment without the right business makes you an expensive hobbyist. Here's the minimum you need to know on the financial side, calibrated for the San Luis Potosí market (and applicable with minimal adjustments to the rest of the Bajío region).
Real pricing in SLP in 2026:
- Basic manicure with regular polish: $150-250 MXN
- Gel polish manicure without extension: $200-350 MXN
- Gel polish manicure with simple nail art: $300-450 MXN
- Soft gel or acrylic extensions: $500-700 MXN
- Basic pedicure: $200-300 MXN
These are the ranges you see in established nail bars in SLP. A home nail tech charges 10-20% less than these prices for the first month to build a client base, and then levels up as they build a reputation.
How to decide your initial price:
Look at 3-5 established nail techs in SLP on Instagram. Check their public prices (those in highlighted stories or their posts). Average them and subtract 10-15%. That's your starting price. Don't put $80 or $100 "to attract more" — it attracts the wrong type of client and burns you out physically and emotionally. If you don't charge at least $150, it's not a business, it's a favor.
How to handle the first stingy client:
Someone will come along (probably an acquaintance, a friend of a friend) who says "I'll give you $100, you charge too much." Three possible responses:
- No. "My price is $200, I'll give it to you for $180 for being a first-time client. If the price doesn't work, no problem, I can recommend you to [another nail tech]". It's honest and respects you.
- One-time gift. "This time I won't charge you anything because you're my friend, but next time it will be $200." This sets a precedent without establishing a permanent discount.
- Honest trade. "I'll do your nails if you help me post a photo on your IG with my account tagged." This actually builds your business.
What you should never do: lower it to $100 "this time" and promise her the normal price "later." "Later" never comes. That client will keep asking you for $100 forever.
How to scale prices every 3-4 months:
Every time your schedule fills up 2 weeks in advance, raise your prices by 10-15%. Give your regular clients 2 weeks' notice ("starting [month] 1st, gel manicures will be $250"). Those who value your work will stay. Those who only came for the price will leave — and that frees up space for better clients who pay more.