Rubber Base: The Technique That Replaces Traditional Gel (2026)
What rubber base is, how it differs from gel and builder, how to apply it, and why almost all nail techs are using it.
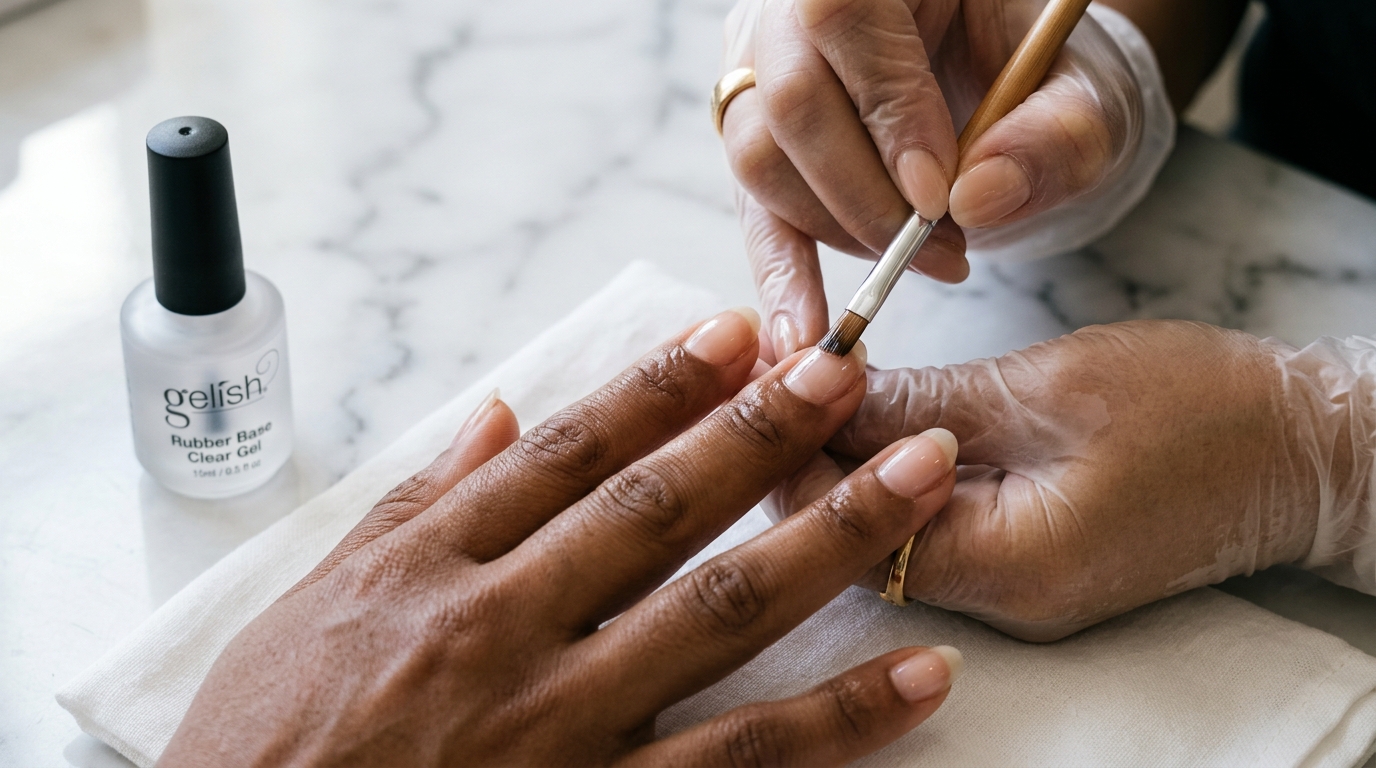
Rubber base is a base coat with builder gel properties — flexible like gel but with the adhesive strength of a builder. In 2-3 years, it went from being a niche product to the new standard in Mexican salons because it combines flexibility, adhesion, and leveling in a single step. If you do natural or short nails, this changes your game.
If you've scrolled through nail techs' Instagrams in the last two years, you've seen the words "rubber base" in every post. If you've been to the salon lately, your nail tech is probably using it even if they haven't told you. And if you do your nails at home, it's very likely you're missing out on the best gel improvement of the last 5 years.
Here, we explain exactly what it is, how it differs from traditional gel and builder gel, how to apply it correctly, and why it's become a favorite among professionals.
- Rubber base is a hybrid between a base coat and builder gel with a thick, elastic consistency
- A good quality bottle costs between $150 and $400 MXN on Mercado Libre Mexico (April 2026)
- It replaces traditional base + sometimes up to 2 layers of leveler, saving time and product
- It provides between 30% and 50% more durability to semi-permanent polish vs. normal base coat
- It appeared commercially around 2020-2021 and became massively popular between 2023 and 2025
What exactly is rubber base?
Rubber base is a type of gel designed to serve as the first layer on the natural nail, but with a formulation that makes it very different from a traditional base coat.
The key lies in the plasticizers — molecules that give it elasticity. A traditional base coat, once cured, becomes hard and rigid. If your natural nail flexes with daily use (and all of them do), the base cracks, causing the color polish to lift.
Rubber base, however, remains flexible even after curing. It moves with your natural nail without cracking. Hence the name — the sensation when pressed is reminiscent of a rubber layer, although it is still gel.
Additionally, its consistency is thicker than a normal base coat. This allows it to self-level on the nail surface: it corrects imperfections, fills depressions, and leaves an even surface on which the gel color looks perfectly uniform.
The 5 Real Advantages Over Traditional Gel
1. Flexibility: It doesn't crack with natural movement
Your nail bends micro-millimeters every time you pick up a glass, type on the keyboard, or make a fist. Traditional rigid gel accumulates micro-fractures with each flex. Rubber base moves with you. That's why it lasts longer.
2. Adhesion: Lasts Longer Without Lifting
The formula is designed to create a stronger anchor with the natural nail. The difference is noticeable: with the same nail preparation, rubber base can give you 3 to 4 weeks of wear when traditional base gives you 2.
3. Leveling: Corrects Uneven Nails
If you have nails with pronounced curvature, depressions, or differences in level between the cuticle and the center, the rubber base self-levels as you apply it. This is something that previously required an additional layer of leveler.
4. Reinforcement: Strengthens Weak Nails
For thin or brittle natural nails, rubber base acts as a flexible mini-armor. It's not as robust as a builder gel for extensions, but it gives enough structure to a weak nail so it doesn't break as easily. Many nail techs use it exclusively as a strengthening treatment without adding color.
5. Efficiency: One Layer Does What Used to Require 2-3
In the traditional flow, you would do: base coat → cure → leveler → cure → color → cure → color → cure → top coat → cure. With rubber base, you replace the base coat and the leveler in a single step. Less product, less time, less lamp exposure.
Rubber Base vs. Builder Gel vs. Polygel
This is where almost everyone gets confused. All three are thick gel products that cure with a lamp, but they are for different things.

| | Rubber Base | Builder Gel | Polygel | |---|---|---|---| | Consistency | Thick, self-leveling | Very dense, doesn't flow | Putty-like | | Cured Result | Flexible | Hard | Hard but light | | What it's for | Base + natural nail leveling | Building extensions and length | Building extensions quickly | | Short Nails | Yes, ideal | Unnecessary | Unnecessary | | Long Extensions | No | Yes, ideal | Yes, ideal | | Difficulty of Use | Easy | Medium | Medium |
Summary: Rubber base is for reinforcing and leveling natural nails. Builder and polygel are for building extensions where you need length and structure. It's not a competition between the three — they are different tools for different problems.
How to Apply It Correctly — Step-by-Step
-
Prepare the nail as usual: file the shape, push back cuticles, buff until the surface is matte, clean with alcohol or cleanser.
-
Apply a thin layer of rubber base starting from the center of the nail, pushing towards the cuticle without touching it. Then drag the brush towards the edges and finally seal the free edge. The layer should look thin and even.
-
Cure in an LED lamp for 60 to 90 seconds. More time is not better — over-cured rubber base can lose some of its characteristic flexibility.
-
If the nail needs more leveling, apply a second, slightly more generous layer, let it self-level for 5-10 seconds, and cure again.
-
Apply your gel color directly over the rubber base. You don't need another layer of base coat on top. The rubber base already fulfills that function.
-
Top coat at the end as usual. Cure, wipe off residue if your top coat leaves a sticky layer, and you're done.
Pro Tip: If you're doing your nails at home for the first time with rubber base, practice on a single nail first to get a feel for how it behaves. It's thicker than a normal base coat, and you might initially want to apply too much.
Most Common Mistakes (and How to Avoid Them)
1. Applying the layer too thick. More rubber base ≠ more strength. A layer that's too thick won't cure properly inside and will lift. If your nail needs more structure, apply two thin layers, curing between each.
2. Not curing enough. Rubber base is thicker, requiring the full 60-90 seconds. If your lamp is low wattage (less than 24W), consider curing longer or investing in a better lamp.
3. Touching the cuticle or skin. As with any gel, rubber base that touches the skin will cause the entire manicure to lift within a few days.
4. Not sealing the free edge. Run the brush along the top edge of the nail with each layer. This is what prevents the polish from "opening up" from the tip.
5. Using rubber base as builder gel for long extensions. It doesn't work. Rubber base is flexible, and a long nail needs rigidity. For extensions, use builder gel or polygel.
Who Is It For?
Definitely Yes:
- Women with thin or brittle natural nails
- Those who prefer short to medium nails (no extensions)
- Nail techs who want to reduce service time
- Anyone who does gel at home and is tired of it not lasting long
- For use under any semi-permanent gel color
Probably Not Necessary:
- Those who only get acrylic with long extensions
- Those who are happy with how long their current gel lasts
- Those who do press-ons or regular polish without gel
Recommended Product
Rubber Fantasy Nails is one of the most popular rubber bases on Mercado Libre Mexico. It comes with 6 shades (transparent and lightly tinted nudes) that serve as a base no matter what gel color you're going to use on top.
If you do your nails at home, we also recommend the primer and leveler for proper preparation before applying the rubber base:
The Mercado Libre links are affiliate links.